Rust

Various projects of mine using the Rust programming language. Many of them involve Haskell, see my Haskell projects.


  Old - Some content is 10+ years old, not representing my current thoughts  

Index


Machine Learning

Gopher
Image Recognition

Some of my code is available on my GitHub Account


Half-Space Software Rasterizer


After having written a traditional scanline rasterizer before, I thought an interesting task would be writing a more modern-style half-space one. This algorithm is actually fairly old, with Pineda's seminal paper, A Parallel Algorithm for Polygon Rasterization , introducing it in 1988. A forum post titled Advanced Rasterization by Nicolas "Nick" Capens is one of the most concise and approachable explanation of the half-space rasterization algorithm I've seen so far. Bonus points for working code. It's interesting to note how half-space functions, cross products and barycentric coordinates are related, and how both can form the basis for rasterization and ray-triangle intersection. This rasterizer implements a different fill convention than the top-left one favored by Direct3D and OpenGL. With pixel centers being at integer coordinates and my origin at the bottom-left, a bottom-left fill rule seemed to make more sense. There's a helpful ASCII art explanation of this decision in the source. 
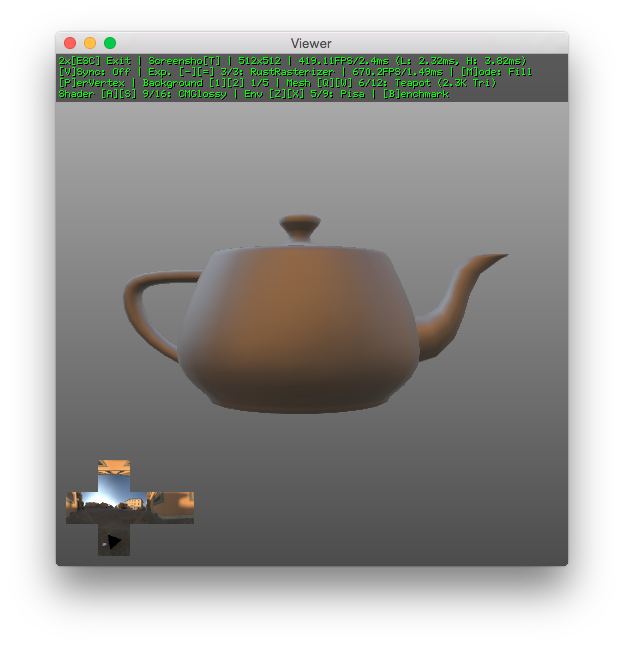
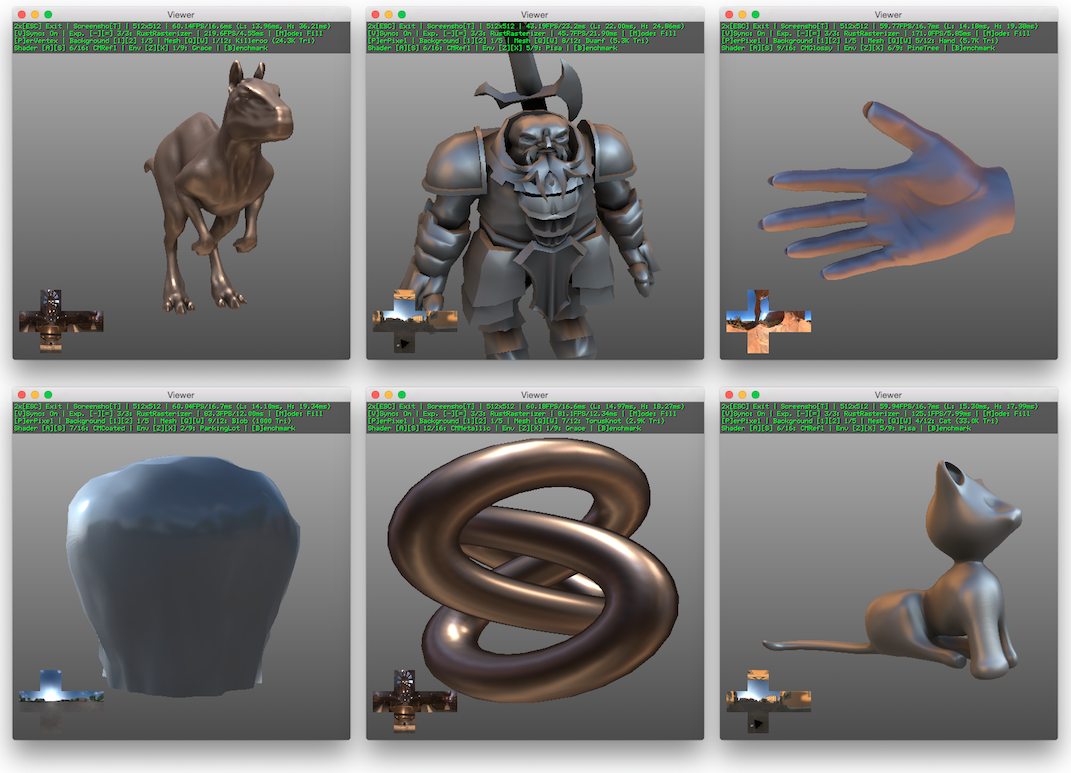
The application here is not just a rasterizer, but a small yet complete renderer. Fabian "ryg" Giesen's series of articles A trip through the Graphics Pipeline 2011 gives an excellent overview of how a modern GPU rendering pipeline works. It's a bit light on the details of the actual rasterizer, but that is remedied in another series of articles by him. I tried to implement something similar to what a GPU would do, so these articles are recommended reading for understanding this program. The same author also published a series of articles called Optimizing Software Occlusion Culling. Especially part 6 on barycentric coordinates and the explanations and optimization ideas in part 7 - 11 were very valuable and helped me a great deal with this project. The author's replies in the comment section are also worth checking out. The material in Rasterization: a Practical Implementation provides a very gentle and basic introduction to the subject. I'd also highly recommend Michael Abrash's writing on the Larrabee rasterizer (Rasterization on Larrabee). It's mostly interesting for the hierarchical and parallel optimizations done to the half-space algorithm. I implemented a coarse raster phase myself, but it did not help very much. Vertex processing, shading and rasterization are all parallelized. Triangles are distributed over a number of tiles, each processed independently. The scoped_threadpool library is used throughout the code for all thread management. This rasterizer also implements a depth buffer (Z not W) and perspective correct interpolation. The Perspective-Correct Interpolation paper is good reading material for the required math. 
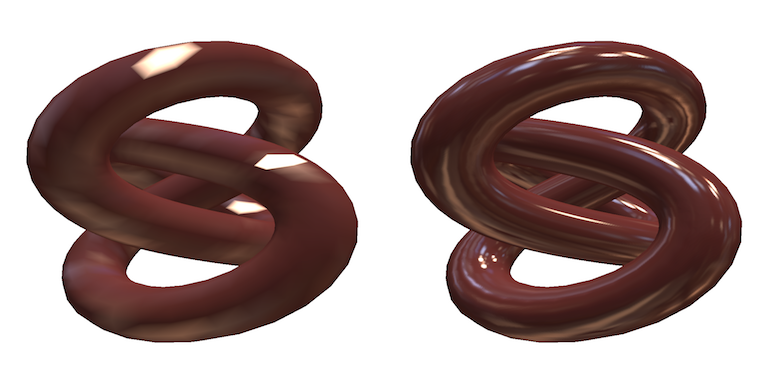
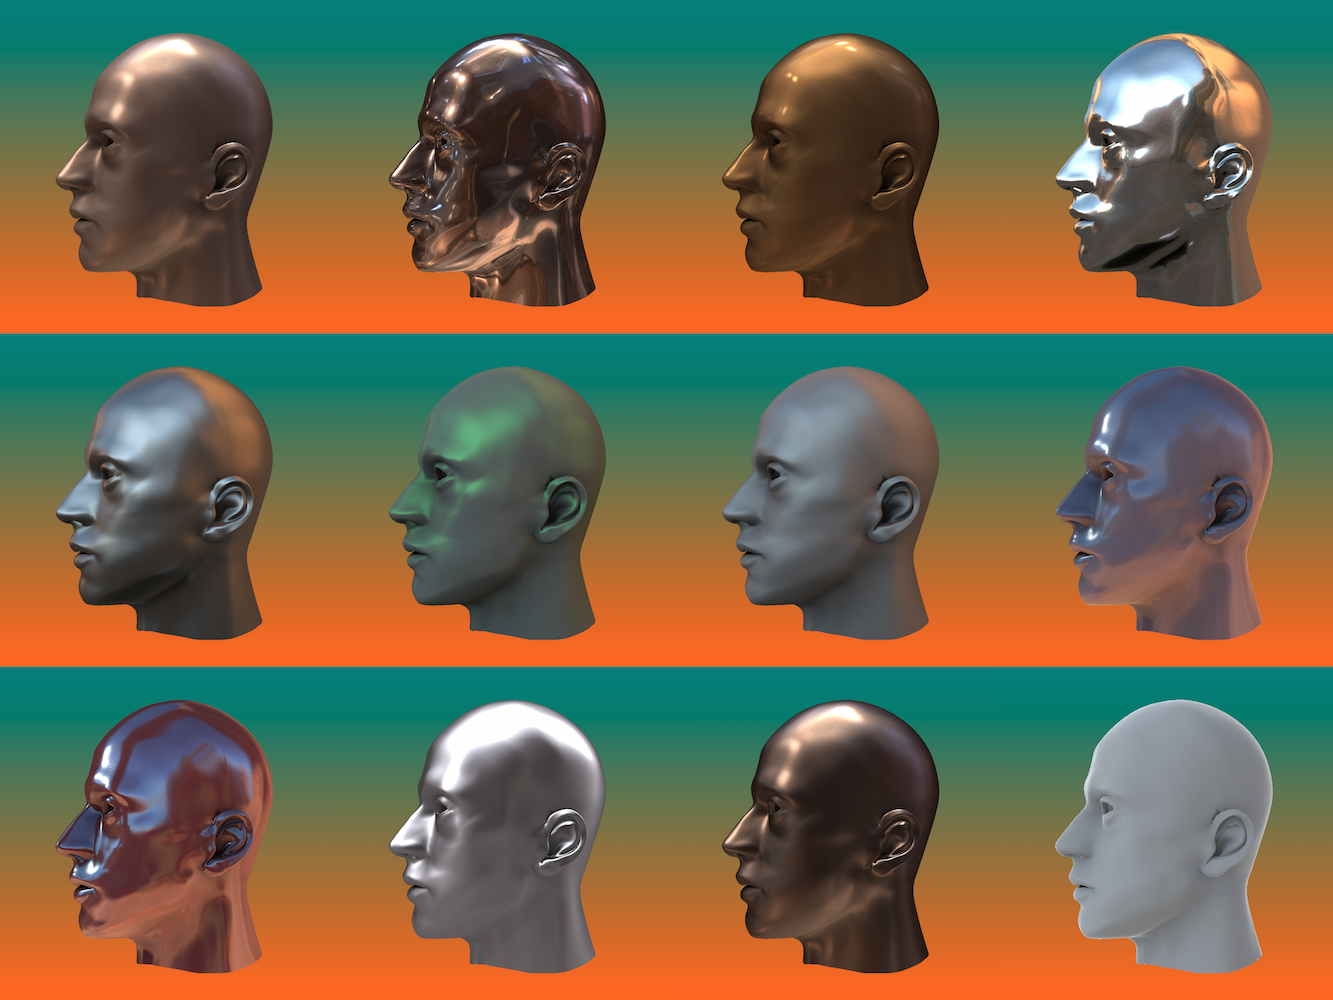
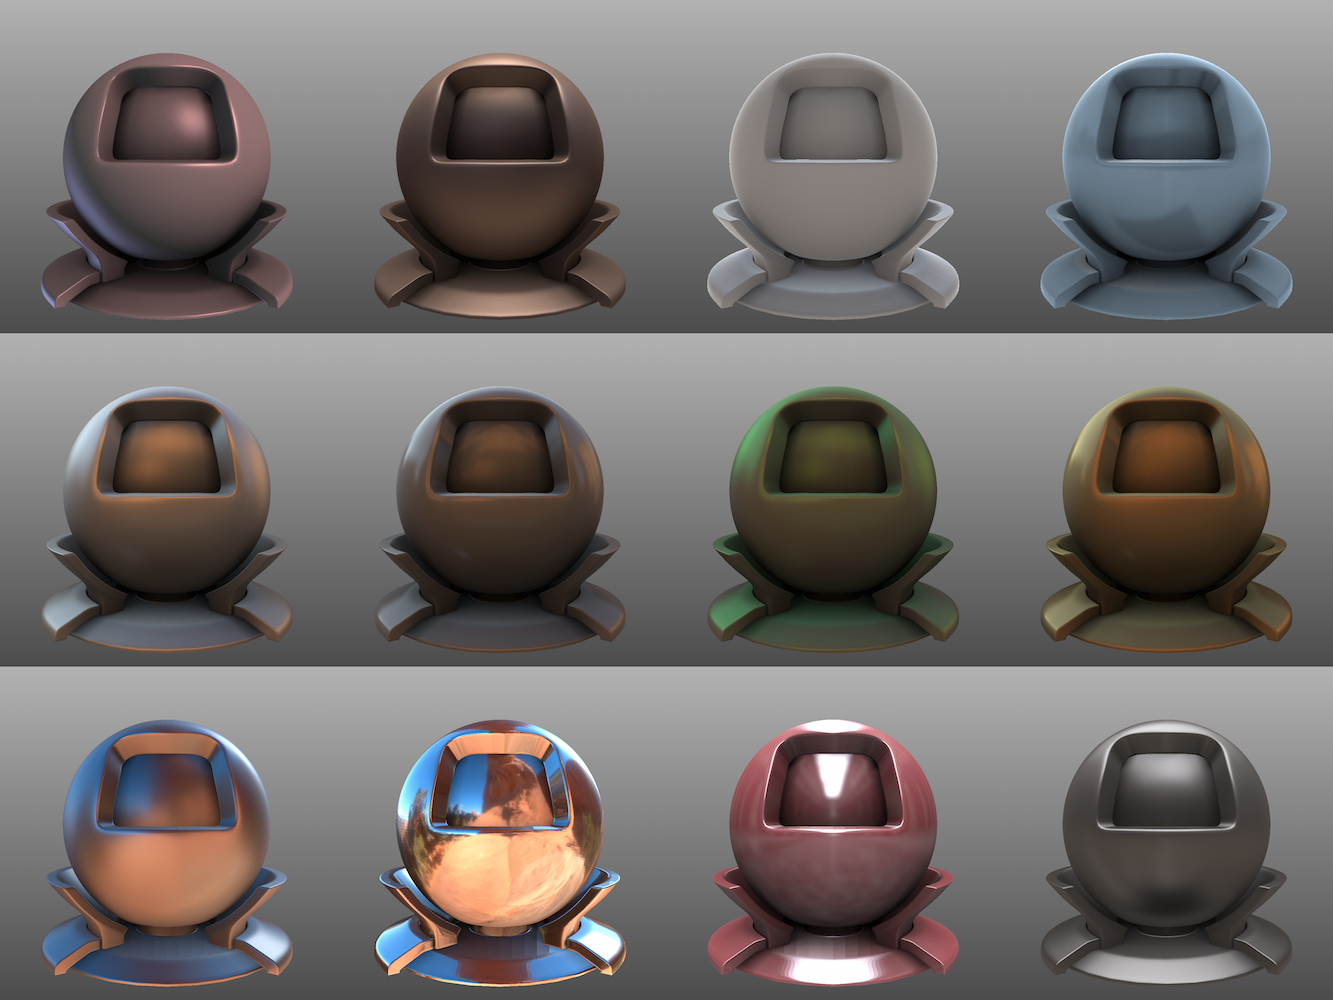
I implemented many different shaders for the renderer. Most of them make use of Image based lighting through Prefiltered environment maps. The Cube maps read by this program where generated by the HDR environment map processing pipeline of another program of mine (GitHub). Several different environments are included, 6x64x64 resolution was sufficient for the prefiltered representations. Shading happens in linear color space, Gamma correction is applied at the framebuffer level. I use an 11bit precision lookup table as a compromise between the cost of a floating-point pow() computation and the banding caused by doing it in 8bit. See this chapter in GPU Gems and this article why this matters. 
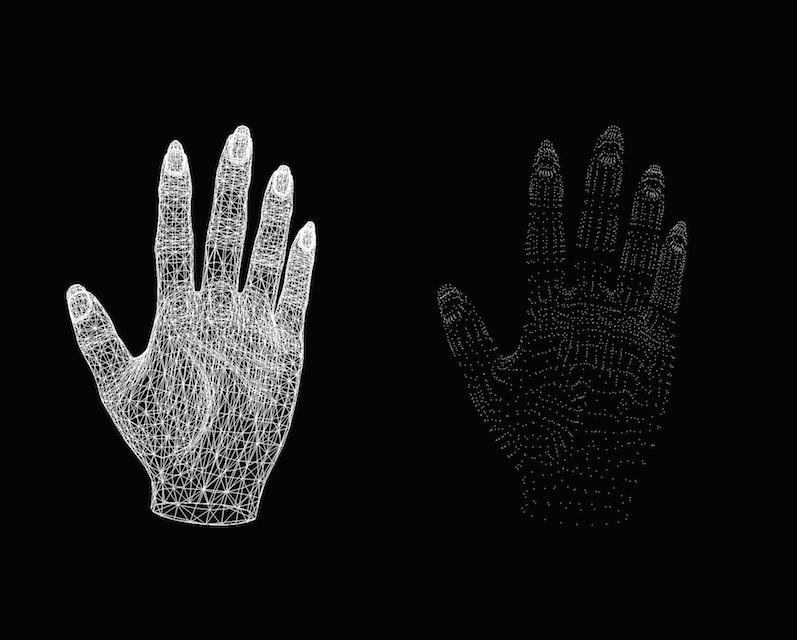
The rasterizer can also render points and has a DDA based wireframe mode. 
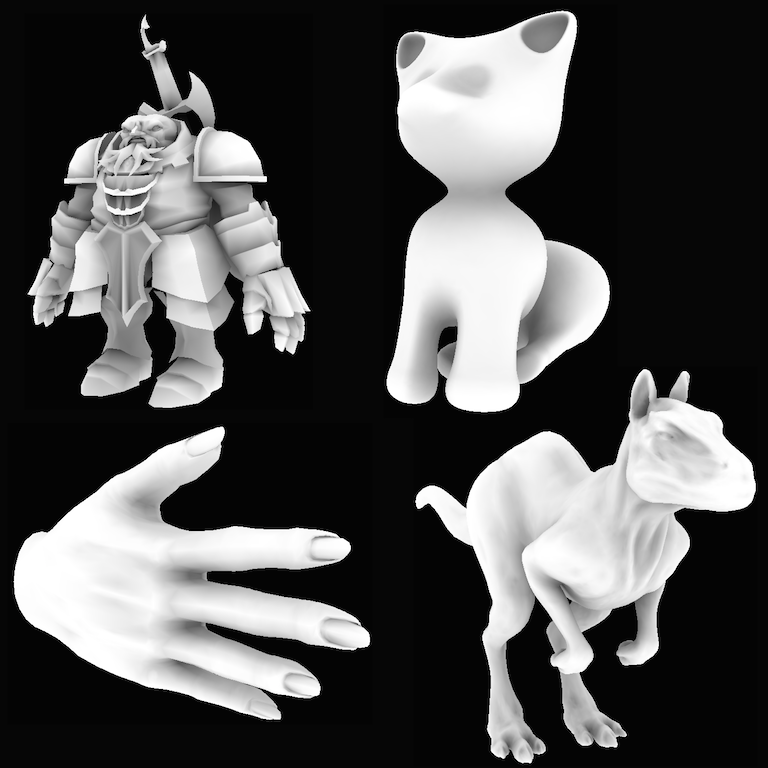
A number of different meshes (loaded from a simple text format) 
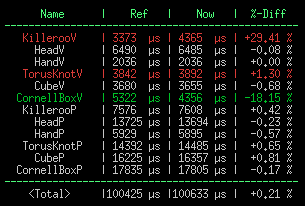
and camera movements are included in the program, allowing to test and profile the rasterizer in different scenarios. 
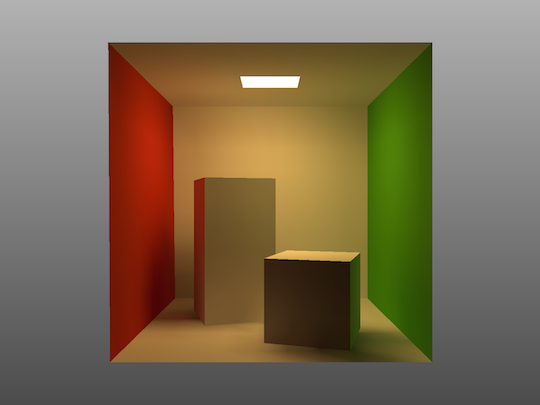
Many of the meshes have baked-in ambient occlusion or radiosity, computed by my own preprocessors (see here and here). Background graphics are also selectable to contrast the shaded meshes optimally. The entire renderer, including mesh loading, all cubemap code, transform, rasterization and shading is about 2k lines of Rust. While the rasterizer is implemented as a Rust library, the application framework is written in Haskell, doing the display, user interaction and non-inner-loop parts. Efficient use of OpenGL PBOs ensures speedy display of the rasterized images. The Haskell application itself might also be of interests. It features a pluggable experiment framework, modern OpenGL 3/4.x style rendering, text output, quad rendering, screenshots, a framebuffer system, an FPS counter, GLSL support, logging etc. A good starting point for your own Haskell + OpenGL adventures. The nalgebra library was used for storage of and operations on vectors, points and matrices. There's plenty of room left for optimizations, but even now using a single core of a 2009 laptop machine the 'Killeroo' mesh can be rendered at 1280x800@60FPS with vertex-level diffuse + glossy IBL.

The source code for this project is available on GitHub.

The Haskell viewing application allows to quickly build a scene by selecting mesh, shader, environment and background as well as rendering parameters. If the shader uses IBL, a preview of the selected environment cube map is being overlaid.
A handy benchmark table gets printed out on request, making it easy to profile the impact of any code changes. Terminal colors are used to make regressions and improvements stand out.
For debugging purposes there's a point and wireframe rendering mode. Nothing fancy, nice to have nonetheless.
Visualizing a radiosity solution precomputed by another project of mine. The illumination is baked into the vertices and simply interpolated at runtime.
For sparsely tessellated meshes the difference between vertex and pixel shading can be significant, in both performance and quality.
Showing a mesh of a human head with changing materials and illumination conditions. Prefiltered environment maps of different cosine exponents are combined for diffuse and glossy illumination effects. Various BRDFs like Phong / Blinn, Fresnel terms, retroreflection etc. can be seen in the images.
The material test scene of the Mitsuba renderer is being put to good use. Ambient occlusion plus IBL with prefiltered cube maps is a very fast approximation for a global illumination type look.
Many of the meshes have ambient occlusion precomputed courtesy of another project of mine. The low frequency of the occlusion and the relatively high tessellation make baking it into the vertices practical.
Cat model with a debug environment cube map. The solid colored faces help to visualize all kinds of errors in transformation, shading and environment map processing.
A few more screenshots of the program in action, showing different meshes, shaders and environments.

Gravitational N-Body Simulation


This is my implementation of an N-Body simulator. Specifically, an N-Body simulator using Newton's law of universal gravitation. This type of simulation can model things like a spinning disk galaxy or planets orbiting a star. I found this general overview to be helpful, it also comes with some Java code. GPU Gems also has a chapter on the subject (HTML / PDF). Some notes from Paul Heckbert's course were also useful during development. The program implements both a brute force O(N^2) algorithm as well as a faster O(N log N) one based on Barnes-Hut simulation. There is an excellent tutorial explaining the latter available here. The simulation itself can be run multi-threaded. It also features adjustable time step and cutoff criteria. Visualization is done using alpha blended particles with tails. There are multiple interesting initial configurations to choose from. For a 10k particles simulation with the Barnes-Hut algorithm and a Theta (cutoff threshold) of 0.85, I get 28 simulation steps per second using one thread on a dual core machine, 49 for two threads. On a faster quad core machine, it is 38, 64, 86 and 103 simulation steps for 1-4 threads, respectively. The tree construction is not parallel and the thread creation overhead is not amortized, otherwise scalability would likely be better.

The source code for this project is available on GitHub.

The interactive viewing application for the N-Body simulator is written in Haskell and uses OpenGL. Keyboard shortcuts are used to control the simulation parameters, threading and initial condition.
Here are a few snapshots from a 'spinning disk galaxy' type initial configuration. The orbiting particles start collapsing on the heavy center mass, then shoot out again in several jets. Finally, a more stable rotation with spiral arms emerges.
Snapshots resulting from a quick collapse of many particles, which then shoot out again and clump up. Multiple centers of mass circle around each other.

Game of Life


This cellular automaton is a bit of fancy 'Hello World' for me. It's simple enough to quickly implement, but still interesting enough for performance comparisons. Also see my Haskell and C# implementations. For a 256x256 grid with torus array boundary conditions, I get 1850 generations per second with a single thread on a dual core laptop machine. This scales to 2550 with two threads. On a faster quad core processor 2550, 3100 and 3600 generations per second can be obtained with 1-3 threads, respectively. Thread creation overhead is not amortized, otherwise scalability would likely be better. It's interesting comparing those numbers to the third iteration of my Haskell GoL program (GitHub). It contains various parallel and serial implementations and a C/C++ reference implementation. Performance numbers are available in the repository documentation.

The source code for this project is available on GitHub.

Haskell viewing application showing the output of the Rust code doing the simulation. There's a small library of interesting patterns which can be recalled.

Terminal Graphics


This experiment is about trying to do the best possible job of displaying bitmapped graphics in a terminal emulator. I discovered a combination of ANSI escape codes and Unicode block elements that gives surprisingly good results. Displaying images in a terminal can be useful in many scenarios, like quickly viewing image previews on a remote machine, outputting graphs and diagrams from a terminal application, previews when using a command line rendering tool, etc.

The source code for this project is available on GitHub.

The first image is using stippling through the light / medium / dark shade glyphs (see Unicode block elements) to create the appearance of multiple shades of gray using only 1 bit per-pixel. The others are setting the background color of an empty character. The second and third image use 4 bit (8 colors plus the high intensity / bold flag) and 8 bit colors. The last image uses true color (24 bit). This is not supported in all terminal emulators, with i.e. iTerm 2 only supporting it in the nightly builds.
Using the quadrant and half block characters from the Unicode block elements allows us to effectively split each character into a 2x2 sub-pixel array, quadrupling spatial resolution while doubling the color one (only two colors assignable for each character). Left image uses 8 bit colors, right one is true color.
The actual glyphs used for the 2x2 super resolution trick in the image above. For this to work we need a font with a proper, gap-less implementation of the block elements. The excellent MiscFixed6x13 typeface is used in all screenshots here.

 © 2002 - 2024 Tim C. Schröder Disclaimer